EWS authentication using applicationimpersonation role
Introduction
There are more options like Graph API on Exchange Online compared with Exchange Server for bulk tasks for user mailboxes.
It’s necessary to get used to EWS for those jobs on Exchange Server.
Using service account with Applicationimpersonation role, let’s practice authentication process for bulk jobs.
Prerequisites
- Download EWS managed API
- Assign Applicationimpersonation for to service account
Download EWS Managed API
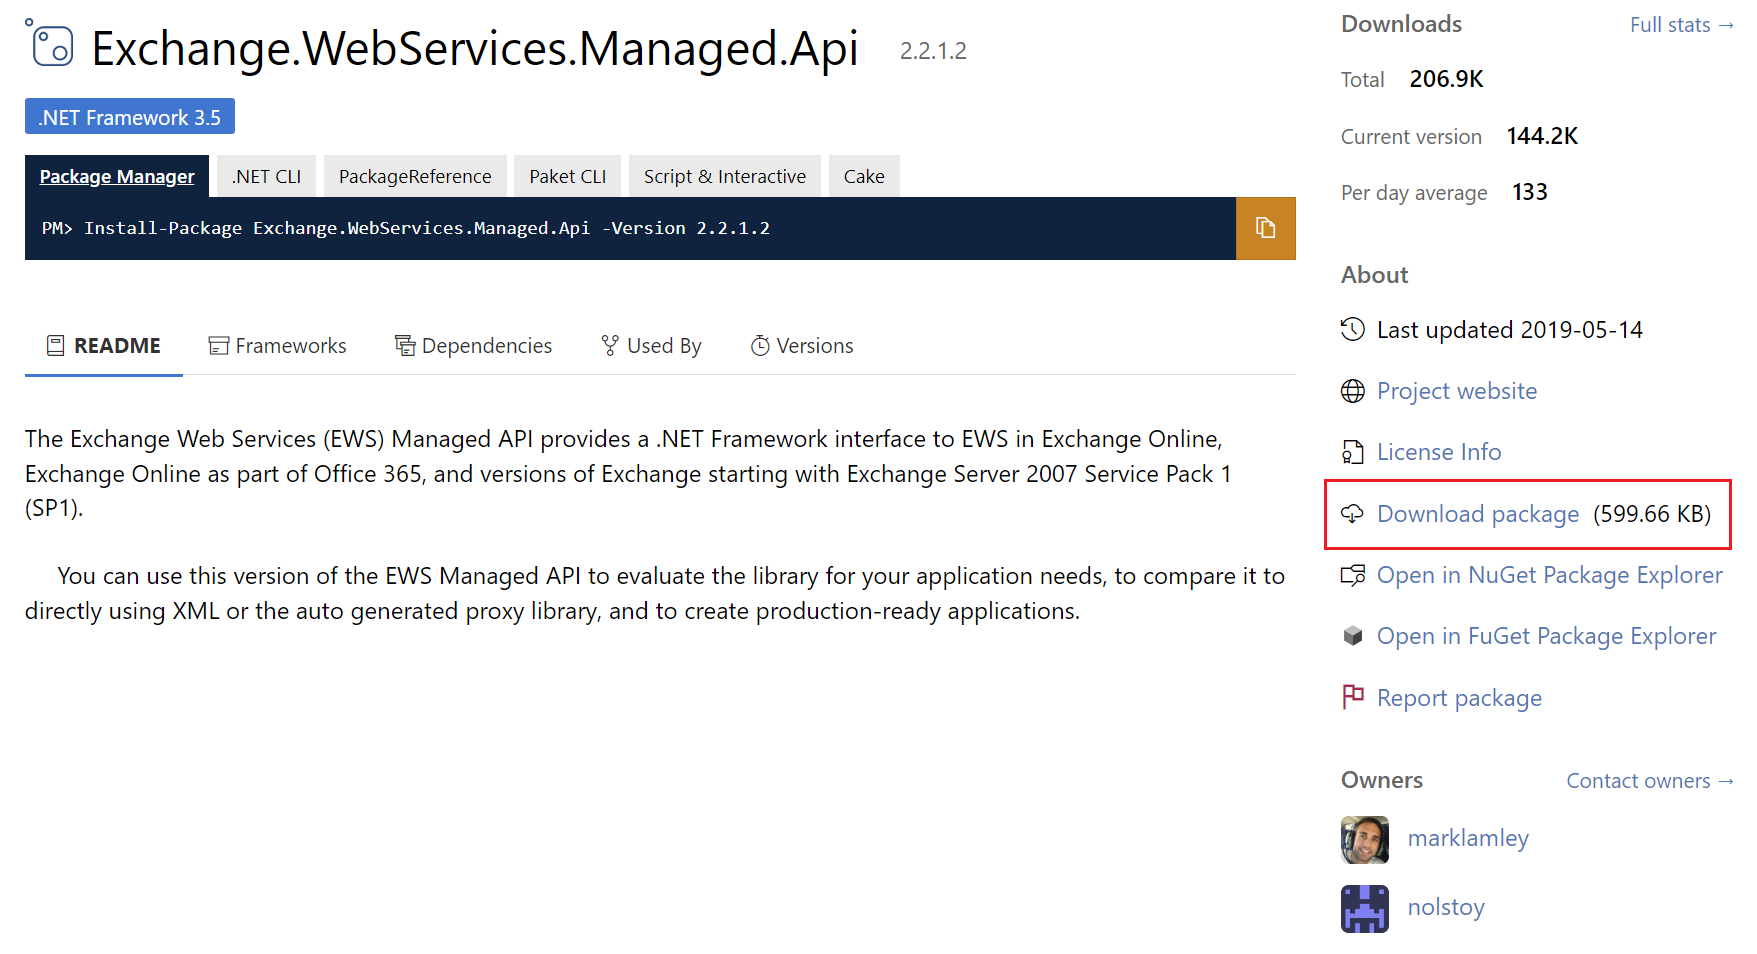
You can get it from following link: NuGet Gallery | Exchange.WebServices.Managed.Api
Using package manager or, direct download is available.
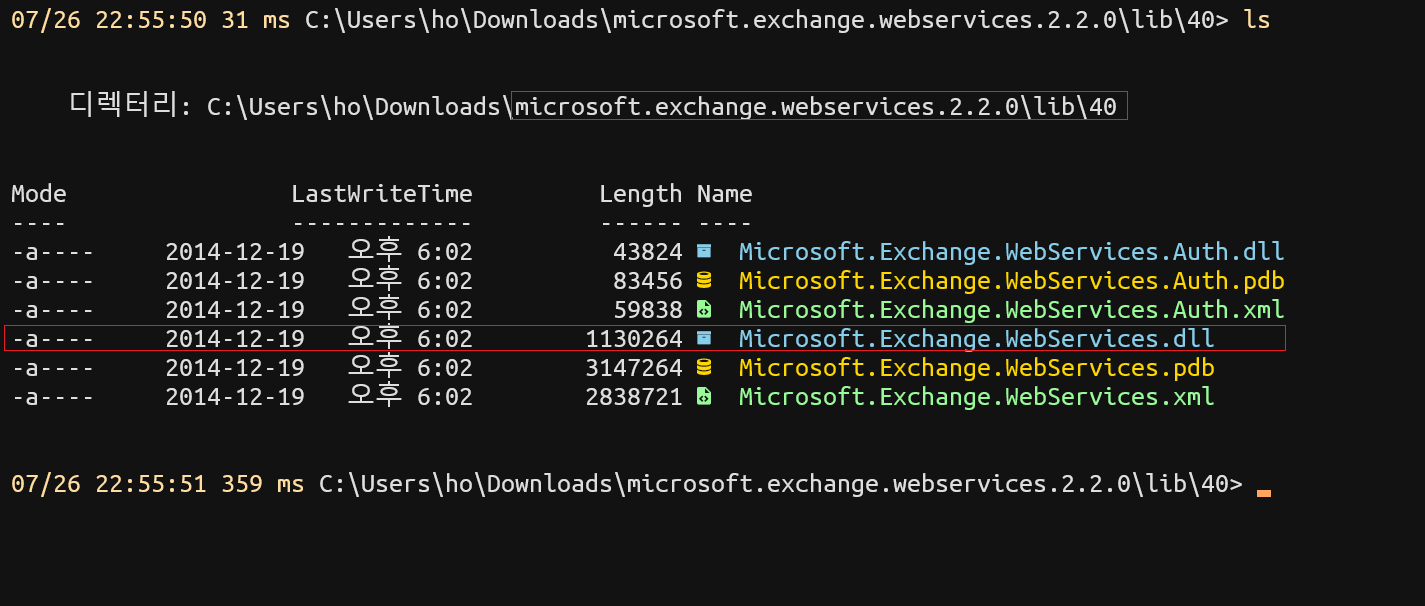
You can find it on folder named ‘lib’ after extract ZIP file.
We will use Microsoft.Exchange.WebServices.dll
Assign Applicationimpersonation role
We can use ECP or PowerShell to assign role.
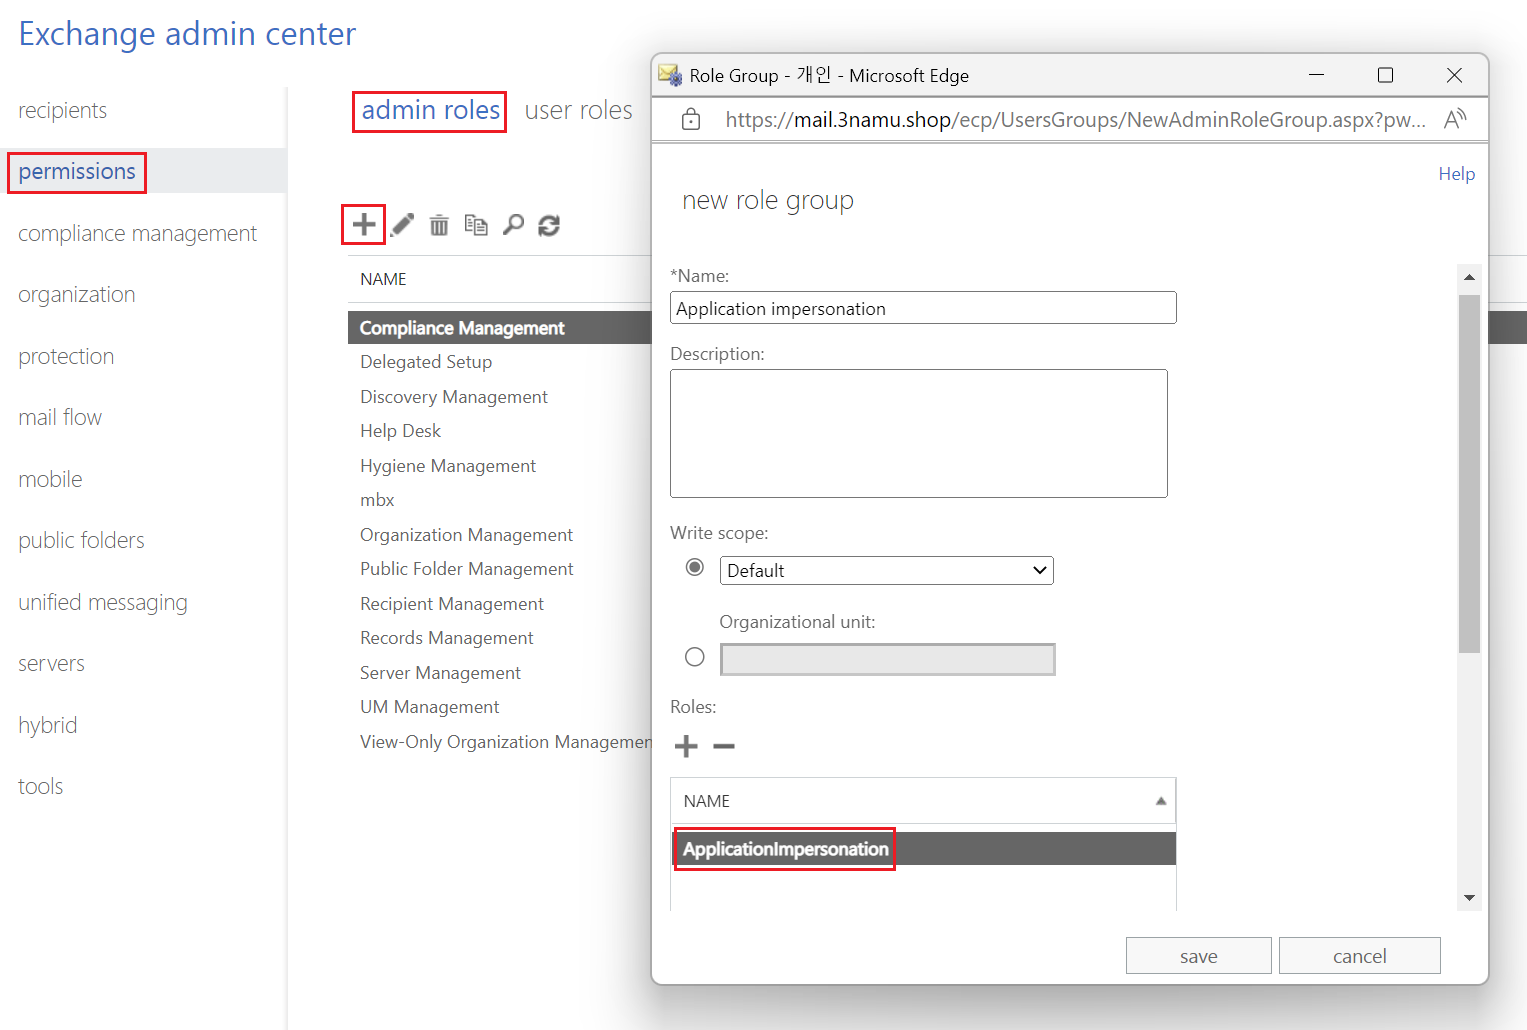
Using ECP
On ECP, add new role group by using permissions -> Admin role
For new added group, assign Applicationimpersonation role.
Add your service account as member.
Applicationimpersonation also used to mailbox migration from Exchange to 3rd party email services.
Using PowerShell
It can be done by one simple line of cmdlet.
New-RoleGroup -Name "Application impersonation" -Roles "Applicationimpersonation" -Members "admin@3namu.shop"
Connection
In this article, we are uing PowerShell.
Import downloaded EWS managed API library.
Please modify file path depends on your environment.
Import-Module "C:\Users\ho\Downloads\microsoft.exchange.webservices.2.2.0\lib\40\Microsoft.Exchange.WebServices.dll"
Set target mailbox.
$MailboxName ="on@3namu.shop"
Provide credential for service account.
$PSCredential = Get-Credential
Create EWS service instance, and add credential, service URL.
Normally, application (script) connecting to their own mailbox, steps to this point are sufficient to access mailbox using EWS.
$Service = [Microsoft.Exchange.WebServices.Data.ExchangeService]::new()
$Service.Credentials = New-Object System.Net.NetworkCredential($PSCredential.UserName.ToString(),$PSCredential.GetNetworkCredential().password.ToString())
$Service.Url = "https://mail.3namu.shop/EWS/Exchange.asmx"
But accessing other mailboxes without permission, an error occurs.
When trying to connect target mailbox,
$folderid= new-object Microsoft.Exchange.WebServices.Data.FolderId([Microsoft.Exchange.WebServices.Data.WellKnownFolderName]::Inbox ,$MailboxName)
$folder = [Microsoft.Exchange.WebServices.Data.Folder]::Bind($service,$folderid)
A permission error occurs like below:
Exception calling "Bind" with "2" argument(s): "The specified object was not found in the store."
At line:2 char:1
+ $folder = [Microsoft.Exchange.WebServices.Data.Folder]::Bind($service ...
+ ~~~~~~~~~~~~~~~~~~~~~~~~~~~~~~~~~~~~~~~~~~~~~~~~~~~~~~~~~~~~~~~~~~~~~
    + CategoryInfo          : NotSpecified: (:) [], MethodInvocationException
    + FullyQualifiedErrorId : ServiceResponseException
We need to fill ImpersonatedUserId property to use impersonated permission.
$ImpersonatedUserId = New-Object Microsoft.Exchange.WebServices.Data.ImpersonatedUserId([Microsoft.Exchange.WebServices.Data.ConnectingIdType]::SMTPAddress,$MailboxName)
$service.ImpersonatedUserId = $ImpersonatedUserId
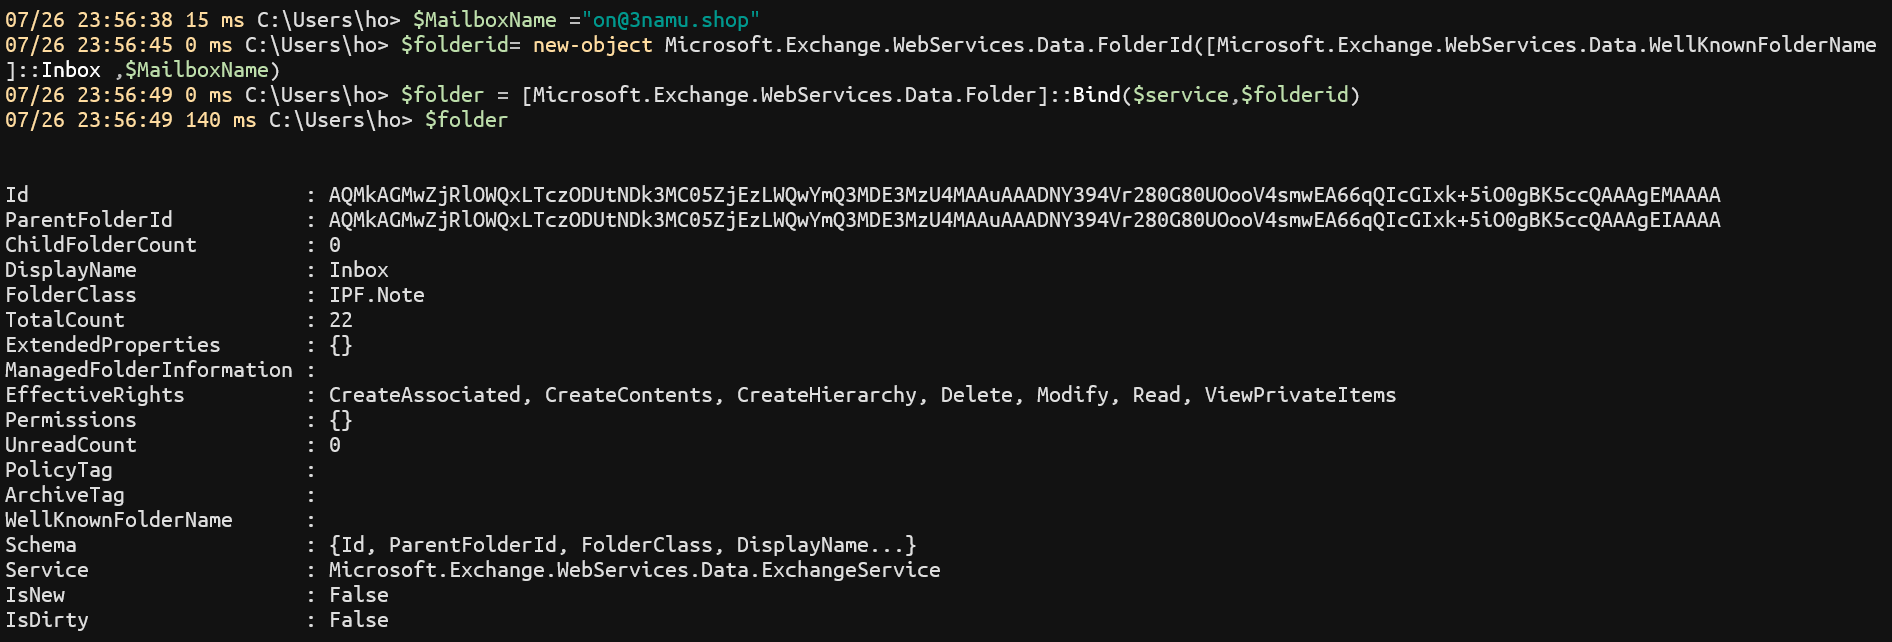
If trying to connect mailbox again, we can see it work now.
Apply to…
A good example for using impersonated permission, we can imagine to empty RecipientCache folder for all mailboxes in organization, retrieved by Get-Mailbox cmdlet.
$mailboxes = Get-Mailbox -Resultsize Unlimited

$mailboxes | %{
  $MailboxName = $_.WindowsEmailAddress
  $ImpersonatedUserId = New-Object Microsoft.Exchange.WebServices.Data.ImpersonatedUserId([Microsoft.Exchange.WebServices.Data.ConnectingIdType]::SMTPAddress,$MailboxName)
  $service.ImpersonatedUserId = $ImpersonatedUserId
  $folderid= new-object Microsoft.Exchange.WebServices.Data.FolderId([Microsoft.Exchange.WebServices.Data.WellKnownFolderName]::RecipientCache, $MailboxName)
  $folder = [Microsoft.Exchange.WebServices.Data.Folder]::Bind($service, $folderid)
  $folder.Empty([Microsoft.Exchange.WebServices.Data.DeleteMode]::HardDelete, $true)
}
